
Introduction
I chose to go with the Parallax Ping Ultrasonic Sensor for this upgrade to my robot. Though only tested on an ATmega8, 168, and 128 this should port over to any AVR 8-bit RISC microcontroller. The reason I chose this sensor is because it is readily available at some local electronics locations instead of having to order online. Most notably, this sensor can be picked up at your local Radio Shack in the Sensor drawer. The datasheet can be found on the Parallax website here (.pdf), please download yourself a copy. You also need to make sure that you have Procyon AVRlib installed.
Theory
The section were most interested in on the datasheet is the 'Communication Protocol' section on page 2.
Here we see that the trigger pulse requires the pin to go high (+5vdc) for a minimum of 2 microseconds, but typically 5 microseconds. If you look at the image above the table you see that it starts low (0vdc), goes high for 5us, and then goes low again. To do this we have to set the pin to be an output, and then we send our trigger pulse. Next, we toggle the pin to be an input and then we listen. We are listening for the Ping Sensor to send the pin a pulse which brings the pin high (+5vdc). While we are listening we have to go into a loop, where the only exit condition is if the pin goes high. Once we receive the signal we are waiting for, we immediatly exit the loop, start the timer, and enter another loop waiting for the singal to end when the pin goes low (0vdc). The last part is to get that timer data into a variable and then do the math to calculate the distance of the object. The minimum and maximum distance the Ping Sensor can read is 3cm to 300cm. The distance is only necesarry if we want to output it to UART in human readable format. Otherwise we can just take the value returned from the timer and use that in the main code to make decisions with.
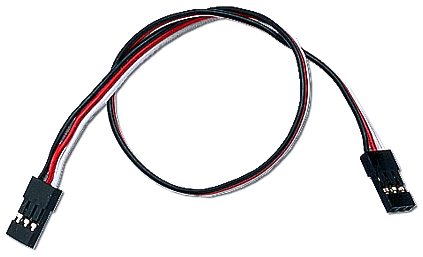
You will need to create some sort of connector cable to interface with your MCU
You will also have to create some sort of mount. Your mount will differ depending on if you want to mount it directly to the chassis or to a servo. For now this tutorial only covers mounting it to the chassis and using it as a touchless bumper.
Coding
Timer -
We are going to use a basic timer in order to record the time that the Ping sensor brings the pin high. Which in turn we can use to calculate the distance away and object is. You need to include the timer header file depending on which mcu you're using.
#include "timer.h"or
#include "timerx8.h"
We also need to add this simple function:
//**************RESET TIMER**************
void reset_timer_0(void) {
//restart timer count
TCNT0=0x00;//clear timer
//clear timer0's overflow counter.
timer0ClearOverflowCount();
}
//***************************************
We also need some sort of function for going backward:
void robot_go_back(void)
{
servo_left(352);
servo_right(200);
}
In the Initialize area of your code add this line:
timerInit(); // initialize the timer system
Registers -
Image of an ATmega8/ATmega168 with ports:

Port registers allow for lower-level and faster manipulation of the i/o pins on the microcontroller. The ATmega8 and ATmega168 have three ports: B, C, and D.
Each port is controlled by three registers, which are also used in the macros.
The DDR register, determines whether the pin is an INPUT or OUTPUT.
The PORT register controls whether the pin is HIGH or LOW.
The PIN register reads the state of INPUT pins set to input with the macros.
DDR and PORT registers are both read and write accessible.
PIN registers correspond to the state of inputs and may only have read access.
The registers are specified with the name of the register and the port (ex. PORTx) x being the port.
DDRD – The Port D Data Direction Register
PORTD – The Port D Data Register
PIND – The Port D Input Pins Register - read only
PORTB – The Port B Data Register
PINB – The Port B Input Pins Register - read only
DDRC – The Port C Data Direction Register
PORTC – The Port C Data Register
PINC – The Port C Input Pins Register
Macros -
There is a header file called sfr_defs.h which is included in io.h. SFR stands for special functions register and the file contains a few useful macros which we can use:
#define bit_is_clear (sfr, bit) (!(_SFR_BYTE(sfr) & _BV(bit)))
Test whether bit bit in IO register sfr is clear. This will return non-zero if the bit is clear, and a 0 if the bit is set.
Test whether bit bit in IO register sfr is set. This will return a 0 if the bit is clear, and non-zero if the bit is set.
#define bit_is_set (sfr, bit) (_SFR_BYTE(sfr) & _BV(bit))
Wait until bit bit in IO register sfr is clear.
#define loop_until_bit_is_clear (sfr, bit) do { } while (bit_is_set(sfr, bit))
Wait until bit bit in IO register sfr is set.
#define loop_until_bit_is_set(sfr, bit) do { } while (bit_is_clear(sfr, bit))
These macros associate simple commands with complicated bitwise operators. You can see examples of these macros in action in the code below.
#define PORT_ON( port_letter, number )            port_letter |= (1<<number)
#define PORT_OFF( port_letter, number )           port_letter &= ~(1<<number)
#define PORT_ALL_ON( port_letter, number )      port_letter |= (number)
#define PORT_ALL_OFF( port_letter, number )     port_letter &= ~(number)
#define FLIP_PORT( port_letter, number )          port_letter ^= (1<<number)
#define PORT_IS_ON( port_letter, number )       ( port_letter & (1<<number) )
#define PORT_IS_OFF( port_letter, number )      !( port_letter & (1<<number)
#define PINGPIN    2          // assign a pin to the Ping Sensor
#define DDR        DDRC
#define PORT       PORTC
#define PIN        PINC
Function:
void ping(void) {
    PORT_ON(DDR, PINGPIN);   // Switch PingPin to OUPUT
// ------Trigger Pulse--------------
PORT_OFF(PORT, PINGPIN);   // Bring PingPin low before starting trigger pulse
delay_us(2);        //  Wait for 2 microseconds
PORT_ON(PORT, PINGPIN);    // Bring PingPin High for 5us according to spec sheet.
delay_us(5);       // Wait for 5 microseconds
PORT_OFF(PORT, PINGPIN);; //  Bring PingPin Low and standby
//--------End Trigger Pulse---------------------
FLIP_PORT(DDR, PINGPIN);   // Switch PingPin to INPUT
loop_until_bit_is_set(PIN, PINGPIN);     // Loop until the the PingPin goes high  (macro found in sfr_def.h)
//clears timer, reset overflow counter
reset_timer_0();       //reset timer 0
loop_until_bit_is_clear(PIN, PINGPIN);     // Loop until the the PingPin goes low  (macro found in sfr_def.h)
//read timer0's overflow counter
//255 is count before overflow, dependent on clock
int elapsed_time=timer0GetOverflowCount()*255+TCNT0;
PingVal = elapsed_time * 2.068965517;t
} // end ping function
In your Main:
//  All the values are based on running at 8MHz. You can see in the comments, I multiplied the original 1MHz values by 8.
while(1) {
scan();
ping();
//Object Avoider
if (PingVal > 8) {
   // object detected
 if (sharp_IR_reading > scan_thresh) {
      //240 far right, 400 center, 448 far left
  //object on left
  if(scan_angle > 380)
             while (sharp_IR_reading > scan_thresh) {
        robot_turn_right();
    sharp_IR_reading=a2dConvert8bit(3);
}  // end while
        //object on right
  else if(scan_angle < 360)    // 41 * 8
             while (sharp_IR_reading > scan_thresh) {
        robot_turn_left();
    sharp_IR_reading=a2dConvert8bit(3);
} // end while
    } // end if
   // object not detected
else
      robot_go_straight();
}  // end if
else {
   while (PingVal < 16) {
        robot_go_back();
  ping();
 } // end while
 for (int i = 0; i > 5; i++)
 robot_turn_right();
}  // end else
delay_cycles(3200);//a small delay to prevent crazy oscillations >; 400 * 8
}  // end while loop
hey could you please also include the code for timer.h.
ReplyDeleteFirst hit on google ;)
ReplyDeletewell ok i did that but i dnt get how you calling this function delay_us(). or is it included in timer.h and also im trying to use this logic on logicflex microprocessor. im not that good at C so is timer.h a library included in C or do you have to write the code for it. thank you
ReplyDeletedelay_us() is included in timer.h which is included in the avr-gcc library. I'm not familiar with logicflex. I suggest you read it's datasheet.
ReplyDeleteThanks for the info! Very helpful.
ReplyDeletemy indicator light is always on. how can i fix that or is that a problem. i've been starting with the pingpin low but the light still stays on like its measuring something.
ReplyDeleteBe carefull to put at least 5V.
ReplyDeleteMine was getting 4.96V and didn't work. It took some time until I found out.
Hi thanks for posting thhis
ReplyDelete